4 days left!
It's pretty much all or nothing at this point, and boy, did I make some mistakes through these stages, I guess that's what happens when the pressure is on.
So I put this picture here, but it's actually a carefully crafted timeline lie! One thing I've found I'm desperately terrible at is remembering to apply a release agent to a master that I'm molding, and ending up with a ridiculous mess of struggling and cleaning up afterwards. For the observant, you can already see the pot of mixed silicone sitting there on the table, curing away all by itself, while I rushed to spray on a coat of rubber release.
I bought myself Platinum Silicone from Smooth-On's LA Subsidiary, Reynolds Advanced Materials. I chose Rebound 25 because not only was it brushable, but a good hardness level for glove molds which is what I was aiming for. Point of note, remember that sulphur will inhibit the cure of silicone, which is why I chose the sulphur free plastalina right back at the start. Goes to show you really need to think all the way to the end, preparation is key.
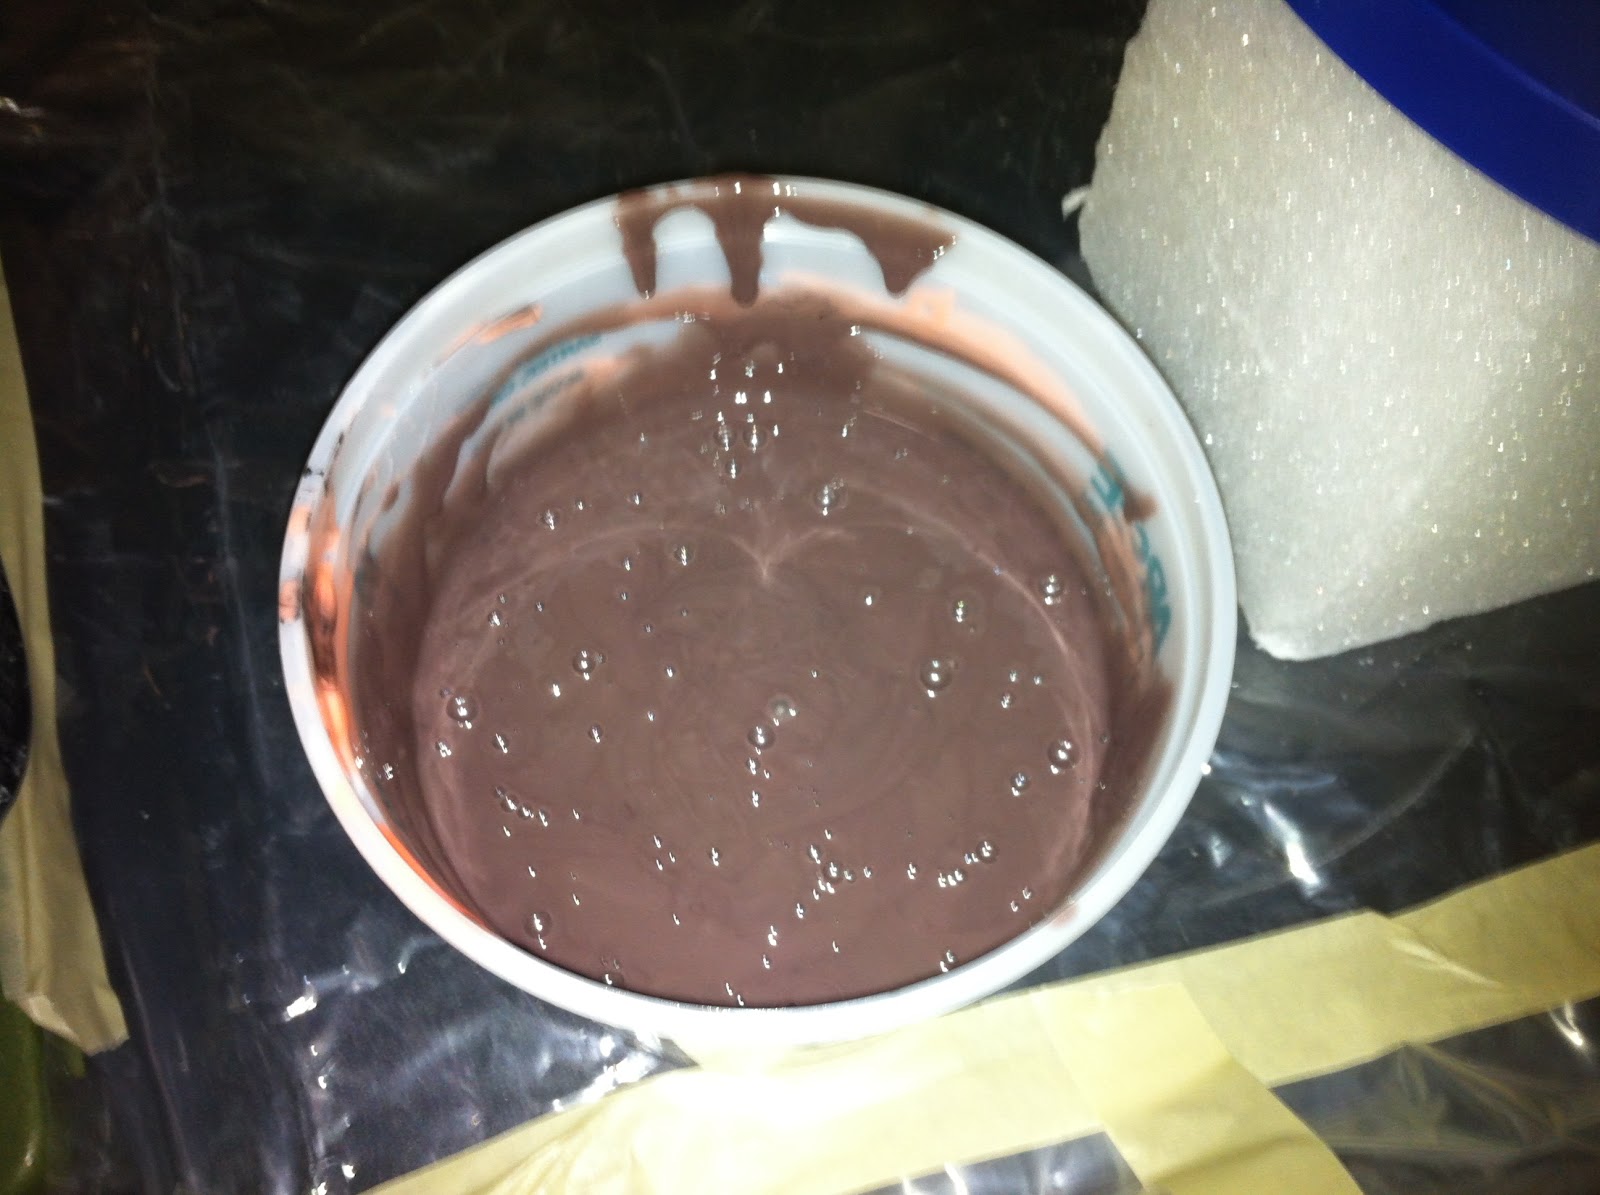
Below is the gallon of silicone (that I was hoping not to use in its entirety), and the first mix. I added a little bit of colourant to the silicone as brushing the orange silicone onto an orange sculpt probably wouldn't have been the best idea, so I chose a dark brown.
And so, disaster strikes! I shall recount the woe, so that you may one day avoid this horrible fate. Due to completely forgetting to apply release, I had already excitedly mixed together the silicone, and it was sitting there in the pot for a while before it even got used. Not only that but I mis-read the instructions that come with the silicone, and grossly mis-judged the working time I had with the silicone.
In short, I thought I would have an hour or more to work brushing the silicone around, but what actually happened was it started solidifying about 10-15 minutes after it was first mixed, which means I was left with only about 2/3 of the sculpt covered by the time it had hardened beyond usable viscosity. What to do?
Well, I grit my teeth and had to accept the loss, I quickly opened the buckets again, poured and remixed, and recoloured, and got to applying the silicone to the last side. Ok, ok, it looks a bit funky, but all in I think I got full coverage without too much pain.
Completely solidified bucket of fail below, pure waste! I guess I can just grind this into silicone bits and use it in future silicone molds I need bulk for. Waste not want not, I guess.
Now that I had a much darker layer, and now after having fully re-read the instructions and understood them, I went ahead with an uncoloured second layer. You can see the natural mix colour here, and the good thing about differentiating the layers his way is you can see where it runs off, and which areas might be too thin.
So basically, you just make sure there's full coverage, and shift it around to make sure there's a decent thickness all over.
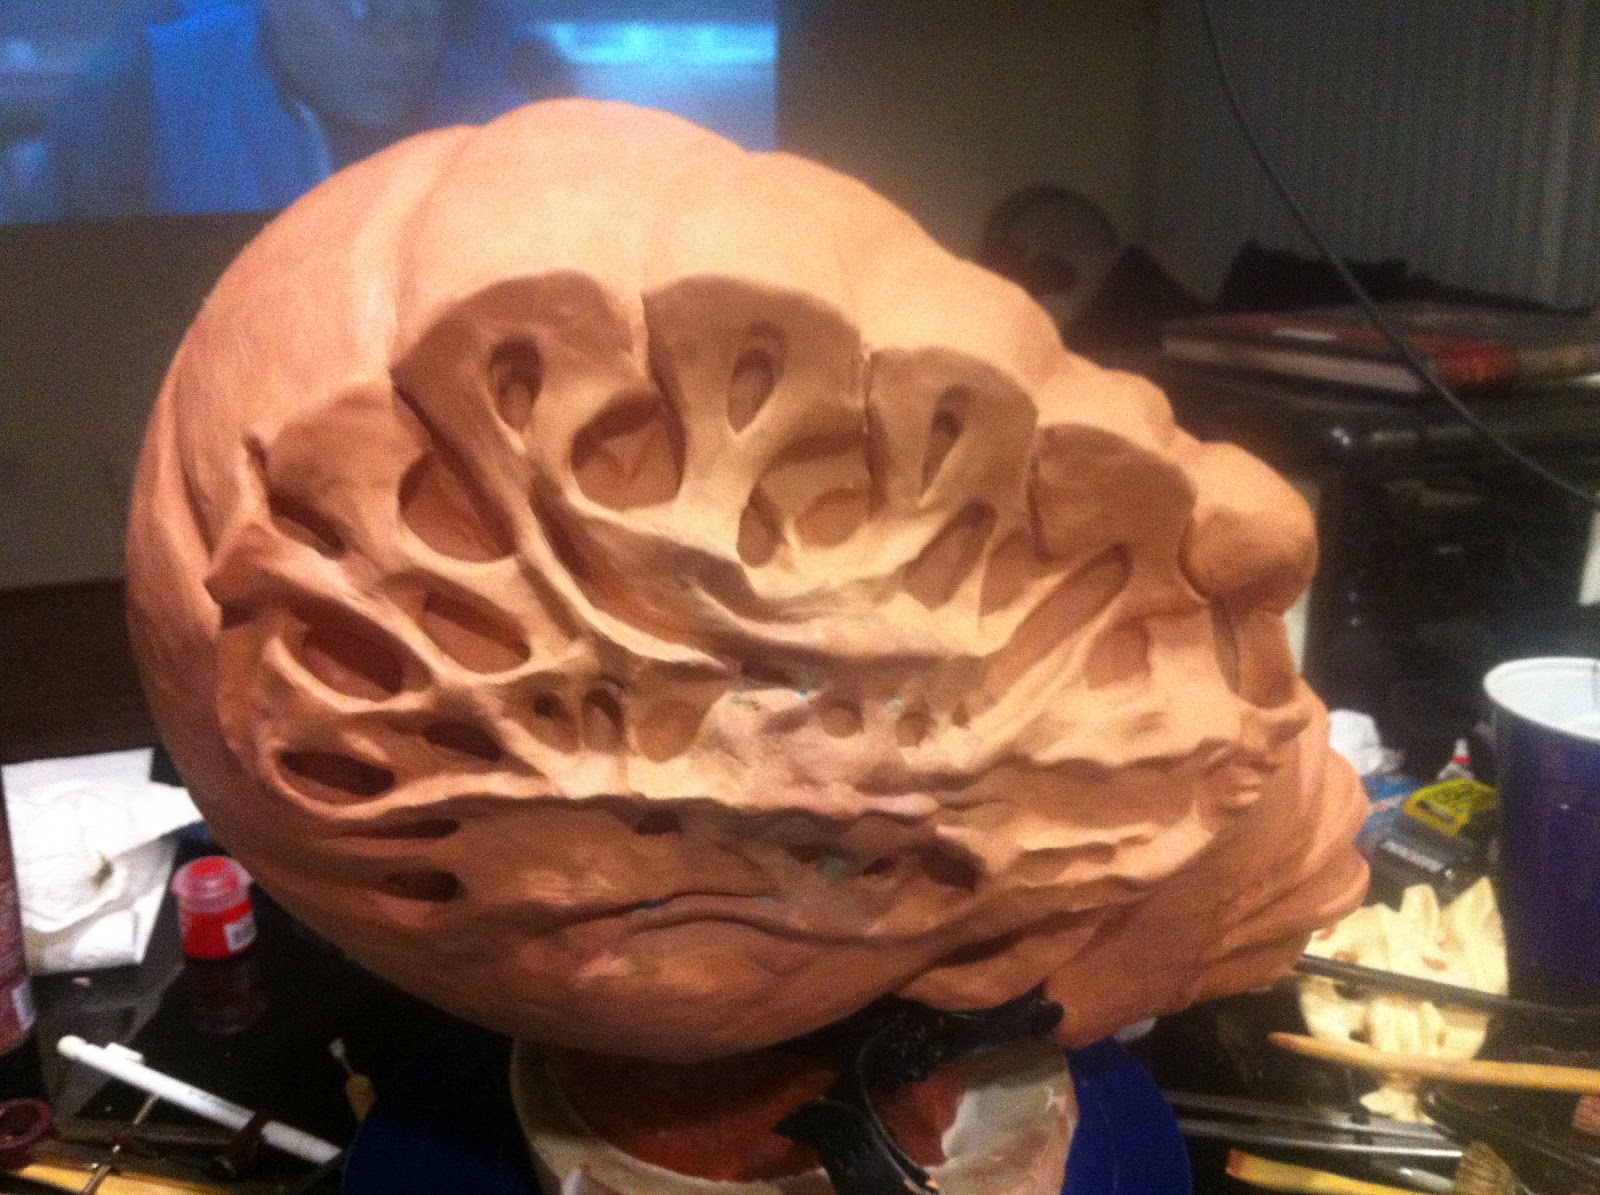
After that, it was time to fill in those wicked bone-structure hollows and undercuts. I got myself some silicone thickener, which is a fascinating chemical that, with just a little, makes runny silicone thick to the point it can be troweled on, will hold in vertical surfaces, and will fill gaps nicely.
The thing to be careful about there is that you don't trap air bubbles in your hollows and undercuts, so I took this one in batches, mixed up silicone, added thickener and colouring, and then poked it into the hollows, trying to eliminate all air bubbles, then repeating the process.
The end goal is to make it into a generic 'blob', which will later make the mother mold easier to get on and off. I think I still need to work on that part a bit, or maybe I use a little too much thickener, but it usually comes out a bit rough.
Once done, added a fourth and final layer to give a final smooth surface.
As you can see in the last pic, I started damming up the edges so that I could create the mother mold. I had to decide how many pieces i was going to make it in, and I toyed with the idea of a two piece mold, but after careful inspection, I really didn't want waste a lot of material and end up with the mother mold locked in place. Looking at the contours, I decided to go for a 4 piece mother mold, back, two sides, and top.
I used Smooth-Ons 'Plasti-paste' which is a trowl-able material that hardens to a plastic solidity. Worked great on the back, so I started immediately damming up the side.
Now here's another epic fail, I was adding release agent this time, as the instructions said plasti-paste will really stick to anything, but this time I think I added too much. I brushed on Vaseline (like I used in scenarios using plaster bandages), but as I was working on the side, the whole thing just slewed off as it started to harden, and while I was still working on it. Imagine my face as the whole side just goes 'bloop!' and falls onto the table below.
Another interesting fact about Plasti-Paste is that its a 3-1 ratio fiber to liquid ratio, and even though I bought a gallon of it, doing the back and side along used most of it, not sure if it's cost effective then, over something like plaster bandages, I'll do some calculations later, or pull the trick that Volpin does, which is to use as little as possible.
Anyway, on the wings of that disaster, and with my deadline approaching fast, I decided to stick with what I know, and went ahead finishing the mother mold with triple-folded extra fast set bandages. Thankfully I've had a lot of experience with these from life casting so much recently, so this was a breeze.
And a final shot of the buckets and mayhem left afterwards...
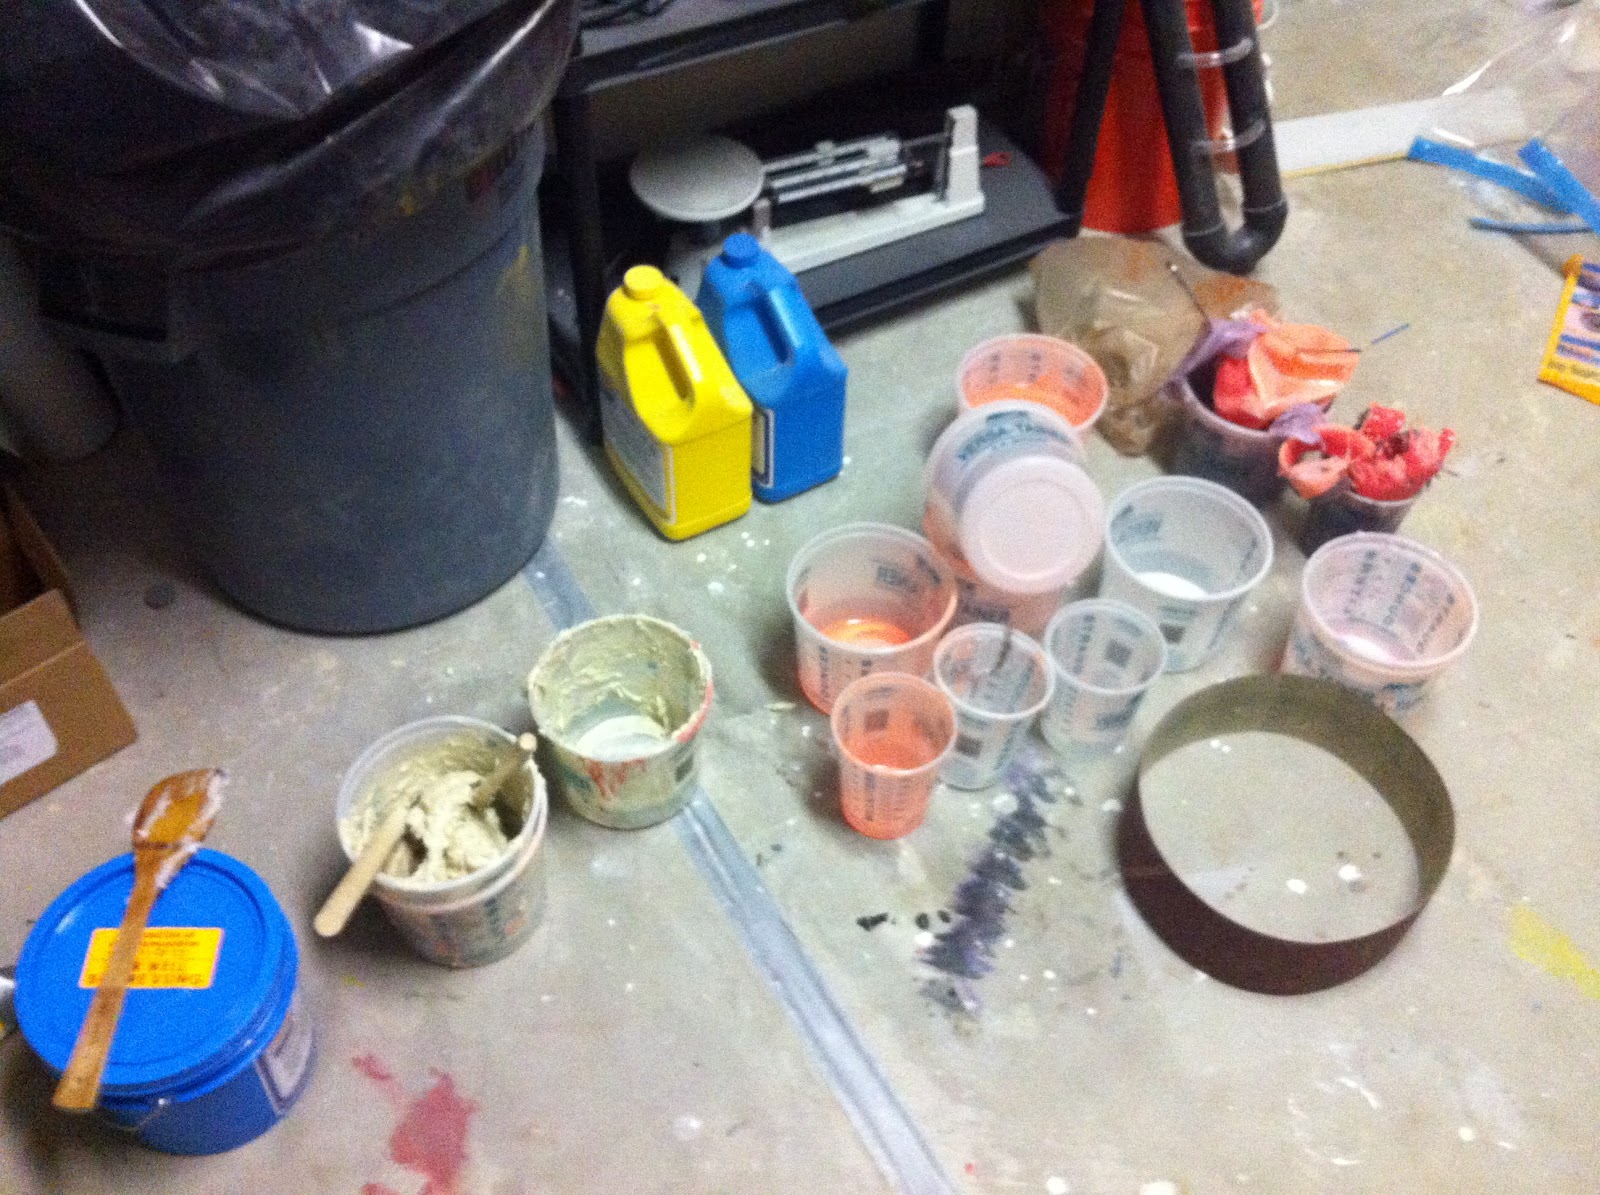
Now to leave it all over night and make sure everything has cured properly. It's quite nerve wracking having to leave it, hopes pinned. It's make or break!
Showing posts with label Release. Show all posts
Tuesday, June 26, 2012
The Sandman's Helm (Pt.9)
Labels:
Cast,
Clay,
Gaiman,
Gas Mask,
Helm,
Mold,
Morpheus,
Mother Mold,
Neil Gaiman,
Plastalina,
Release,
Resin,
Rubber,
Sandman,
Sandman Helm,
Shell,
Silicone,
Skull,
Spine,
Van Aken
Sunday, June 24, 2012
The Sandman's Helm (Pt.8)
So here I am, back at the helm, and sure enough, I wasn't too impressed with the middle section. Only one week left till finish, but I do like a challenge!
I fiddled around with it a bit, but I already knew the writing was on the wall, I just didn't like it's current incarnation. Here is where I ended up.
So I originally got the idea of copying the tail-bone of the medical spine I had, and then it occurred to me, instead of 'copying it', why don't I ACTUALLY copy it, making a mold and a cast, that way I could get two exactly identical bones sections for either side.
I spent a while preparing the spine that you can see here (below) by eliminating the undercuts that would cause the mold to be stuck to the original, but thanks to the wonderful flexible properties of silicone, I didn't need to go too far, and I could keep some deep depressions for further detail.
The mold, pretty dirty, but I was trying to save money and therefore silicone. Turned out great though!
I then pulled two copies using some clear urethane resin I had lying around. I also recently bought some aluminium powder for future metal-looking castings, hence why they turned out grey.
And now for the interesting part! I cut out the work I was unhappy with, right down to the head cast. I then placed the tailbone against the head with some clay underneath to support its weight and keep it in place, after that, it was a matter of taking the lines of the tail-bone and making them 'flow' into the other sculpted detail.
I think you'll agree this is vastly better!
Spent some time cleaning up the ridges, the Y shapes and making sure the tail bone blended seamlessly with the rest of the head. I also decided to remove the detail from the lower helm closest to the neck, I would probably need it o be stronger down there, so detail might not be a good idea.
Looks great!
I went straight to work on the other side, measuring and copying the whole time. This time, with the tail-bone being an exact copy, I just needed to place it carefully, and the rest was a piece of cake. I busted out the other side.
Cleaned up the remaining pieces of the left side, and done my last adjustments to make sure both sides are as symmetrical as possible (without actually being symmetrical, that would just be weird from an anatomy standpoint!)
And here we have it, finished, both sides, and front. All smoothed out and pretty. Sadly it was one HEAVY sonuvagun, carting it about must have given me the best workout I've had in a while!
As soon as I can, onto molding and casting this beast!
And for your viewing pleasure, a video so you get a better idea of how it looks in real life. (Is this real life!?)
I fiddled around with it a bit, but I already knew the writing was on the wall, I just didn't like it's current incarnation. Here is where I ended up.
So I originally got the idea of copying the tail-bone of the medical spine I had, and then it occurred to me, instead of 'copying it', why don't I ACTUALLY copy it, making a mold and a cast, that way I could get two exactly identical bones sections for either side.
I spent a while preparing the spine that you can see here (below) by eliminating the undercuts that would cause the mold to be stuck to the original, but thanks to the wonderful flexible properties of silicone, I didn't need to go too far, and I could keep some deep depressions for further detail.
The mold, pretty dirty, but I was trying to save money and therefore silicone. Turned out great though!
I then pulled two copies using some clear urethane resin I had lying around. I also recently bought some aluminium powder for future metal-looking castings, hence why they turned out grey.
And now for the interesting part! I cut out the work I was unhappy with, right down to the head cast. I then placed the tailbone against the head with some clay underneath to support its weight and keep it in place, after that, it was a matter of taking the lines of the tail-bone and making them 'flow' into the other sculpted detail.
I think you'll agree this is vastly better!
Spent some time cleaning up the ridges, the Y shapes and making sure the tail bone blended seamlessly with the rest of the head. I also decided to remove the detail from the lower helm closest to the neck, I would probably need it o be stronger down there, so detail might not be a good idea.
Looks great!
I went straight to work on the other side, measuring and copying the whole time. This time, with the tail-bone being an exact copy, I just needed to place it carefully, and the rest was a piece of cake. I busted out the other side.
Cleaned up the remaining pieces of the left side, and done my last adjustments to make sure both sides are as symmetrical as possible (without actually being symmetrical, that would just be weird from an anatomy standpoint!)
And here we have it, finished, both sides, and front. All smoothed out and pretty. Sadly it was one HEAVY sonuvagun, carting it about must have given me the best workout I've had in a while!
As soon as I can, onto molding and casting this beast!
And for your viewing pleasure, a video so you get a better idea of how it looks in real life. (Is this real life!?)
Labels:
Alumite,
Cast,
Clay,
Dream,
Gaiman,
Gas Mask,
Helm,
Medical Spine,
Mold,
Morpheus,
Neil Gaiman,
Plastalina,
Release,
Resin,
Rubber,
Sandman Helm,
Silicone,
Skull,
Spine,
Van Aken
The Sandman's Ruby (Dreamstone Pt.3)
With all the excitement focused on the helm, I decided to take a break and take another experimental stab at the Dreamstone to see if I could produce something of considerable 'gem-like' quality.
Rather than follow my own previous advice by using wood, I, for some unknown reason, decided to try again with foam core board. The difference this time was that I had recently purchased a belt sander, and I was thinking that I could maybe use the same technique, but with the sander, would be able to precision sand down to the lines I wanted.
Seriously, if you do this yourself, just use wood, I'm a glutton for punishment and trials.
Here is another round of pics.
As you can see, the upper surface is smooth, a vast improvement on the last attempt, however, thinking ahead, I thought this might not be the best-case scenario, as I wanted to put lights in there, and have the diffusely blink. A clear outer surface would probably leave the full glare exposed, so I basically just peeled off the top layer, leaving the foam exposed underneath (the rough texture would therefore translate into a diffused glass pattern, or so I hoped, seemed to make sense in my head).
I then went about molding the stone, and as usual, I like to experiment, so I used a little of a trial pack of Smooth-On's Oomoo silicone rubber, which has the excellent properties of not needing to be vacuum degassed (remove the air bubbles that might cause you problems later). I don't have a vacuum chamber, so this seemed like a good time to test this out on a rough surface.
I then went ahead, after it has set, to pouring some Alumilite Clear resin in there and slushing it around till it set. The hard part here was getting it to that the edges were thick enough to support the rest of the shell. I didn't quite get this right, and it would be the same with the helm later, I need to sculpt in a dam or indent so that the negative will be able to accommodate more resin at the very edges.
Here is the mold after a couple of resin pours.
While that was fully curing, I finally took my own advice, and started with wood to construct the frame of the Dreamstone. I took some hobby wood, cut the size out, and then sanded down the interior bevel with a Dremel sanding bit.
I then took some progressively higher and higher grit sanding paper to it until the edges were perfectly smooth. I went and drilled two decent sized holes in the back surface, more on the reason for this next.
So completely by chance, while I was shopping for pieces of Soo's Delirium costume, I came across some very cheap and cheesy 'diamond rings', which were actually just hunks of plastic on a plastic ring mount, with blinking L.E.D.s in them. I guess some ladies like the bling bling to literally bling.
I grabbed a couple of these, took them back and cut the L.E.D. circuits from the housing, leaving me two small boards with three L.E.D.s on them. These already had three sets of blinking patterns built into them, so I was delighted I could just dump learning simple electronics for post project, and use these in the interim (weight off my shoulders knowing I might be able to achieve the Dreamstone effect I wanted without any effort!
To give the 'cloudy' effect, I already knew from years of art as a kid that if you wanted clouds, you used cotton wool, so another quick test later verified that I was right (past-me was smiling), here's how it turned out.
I decided to put the whole assembly together as a preview, two L.E.D.s, wood frame and clear Dreamstone. Here is a video of how excellent it came out.
I pulled the Dreamstone casing from its mold, and started with progressive layers of a red ink wash until I achieved the desired richness. Also, despite the foam core being ridged (take a look at the sides, you can see in the cast that the 'edges' where the individual boards were glued came out, like I say, use one piece of wood and every surface will be super smooth, don't make my mistake!).
Still, I like the sharpness of the edges, and it would definitely do.
While the ink was drying, I took some Rustoleum gold primer to the Dreamstone mount, which handily sat on the steel floor post I got with the medical spine!
Once I was happy with the red colour of the Dreamstone, I started wondering if I could make it more 'glassy' and shiny, without actually losing the diffuse element (despite the fact that the cotton wool was going to be doing most of the work). At his point, if I had used wood, I probably wouldn't have the problem, and the cotton wool and paint job would have done the work, but this is a fine example of knowing when to stop.
I didn't know when to stop, so I pressed ahead with adding another layer of Crystal Clear resin on top, thinking it would smooth things out.
Called it a night here, and went to bed, hopeful for the next day!
Rather than follow my own previous advice by using wood, I, for some unknown reason, decided to try again with foam core board. The difference this time was that I had recently purchased a belt sander, and I was thinking that I could maybe use the same technique, but with the sander, would be able to precision sand down to the lines I wanted.
Seriously, if you do this yourself, just use wood, I'm a glutton for punishment and trials.
Here is another round of pics.
As you can see, the upper surface is smooth, a vast improvement on the last attempt, however, thinking ahead, I thought this might not be the best-case scenario, as I wanted to put lights in there, and have the diffusely blink. A clear outer surface would probably leave the full glare exposed, so I basically just peeled off the top layer, leaving the foam exposed underneath (the rough texture would therefore translate into a diffused glass pattern, or so I hoped, seemed to make sense in my head).
I then went about molding the stone, and as usual, I like to experiment, so I used a little of a trial pack of Smooth-On's Oomoo silicone rubber, which has the excellent properties of not needing to be vacuum degassed (remove the air bubbles that might cause you problems later). I don't have a vacuum chamber, so this seemed like a good time to test this out on a rough surface.
I then went ahead, after it has set, to pouring some Alumilite Clear resin in there and slushing it around till it set. The hard part here was getting it to that the edges were thick enough to support the rest of the shell. I didn't quite get this right, and it would be the same with the helm later, I need to sculpt in a dam or indent so that the negative will be able to accommodate more resin at the very edges.
Here is the mold after a couple of resin pours.
While that was fully curing, I finally took my own advice, and started with wood to construct the frame of the Dreamstone. I took some hobby wood, cut the size out, and then sanded down the interior bevel with a Dremel sanding bit.
I then took some progressively higher and higher grit sanding paper to it until the edges were perfectly smooth. I went and drilled two decent sized holes in the back surface, more on the reason for this next.
So completely by chance, while I was shopping for pieces of Soo's Delirium costume, I came across some very cheap and cheesy 'diamond rings', which were actually just hunks of plastic on a plastic ring mount, with blinking L.E.D.s in them. I guess some ladies like the bling bling to literally bling.
I grabbed a couple of these, took them back and cut the L.E.D. circuits from the housing, leaving me two small boards with three L.E.D.s on them. These already had three sets of blinking patterns built into them, so I was delighted I could just dump learning simple electronics for post project, and use these in the interim (weight off my shoulders knowing I might be able to achieve the Dreamstone effect I wanted without any effort!
To give the 'cloudy' effect, I already knew from years of art as a kid that if you wanted clouds, you used cotton wool, so another quick test later verified that I was right (past-me was smiling), here's how it turned out.
I decided to put the whole assembly together as a preview, two L.E.D.s, wood frame and clear Dreamstone. Here is a video of how excellent it came out.
I pulled the Dreamstone casing from its mold, and started with progressive layers of a red ink wash until I achieved the desired richness. Also, despite the foam core being ridged (take a look at the sides, you can see in the cast that the 'edges' where the individual boards were glued came out, like I say, use one piece of wood and every surface will be super smooth, don't make my mistake!).
Still, I like the sharpness of the edges, and it would definitely do.
While the ink was drying, I took some Rustoleum gold primer to the Dreamstone mount, which handily sat on the steel floor post I got with the medical spine!
Once I was happy with the red colour of the Dreamstone, I started wondering if I could make it more 'glassy' and shiny, without actually losing the diffuse element (despite the fact that the cotton wool was going to be doing most of the work). At his point, if I had used wood, I probably wouldn't have the problem, and the cotton wool and paint job would have done the work, but this is a fine example of knowing when to stop.
I didn't know when to stop, so I pressed ahead with adding another layer of Crystal Clear resin on top, thinking it would smooth things out.
Called it a night here, and went to bed, hopeful for the next day!
Labels:
Alumilite,
Cast,
Dream,
Dreamstone,
Foam Board,
Foamcore,
Gaiman,
Mold,
Morpheus,
Neil Gaiman,
Release,
Resin,
Rubber,
Ruby,
Sandman
Monday, April 30, 2012
The Sandman's Ruby (Dreamstone Pt.2)
OK, so I've never tried to reproduce 'sturdy glass' before, and even fake gemstones are something I've considered to be too heavy in large sizes for anyone to wear all night, unless you are Mr. T of course.
I had some clear resin from Alumilite lying around, and in a moment of craziness decided to see if I could rapid prototype a Dreamstone from a basic mold and cast process of the simplest variety.
Starting with the foam board I glued together from the last post, I manually cut down the edges with an Xacto blade to the best of my steady-hand ability (beer may have been required to steady that hand), and then used some clay to fill and roughly smooth down the edges.
Once done, I then whipped up a quick box, applied some Vaseline to the surface of the prototype gem shape as a release agent (it was lying nearby from a previous life cast I had done), and poured myself a concrete mold.
Not bad, not bad at all, but I could already see some potentially hazardous and troublesome undercuts, nonetheless I pressed on. I mixed up my clear resin, put a thin red wash of 'paint' in there, and 'Slush cast' the resin around the inside.
It was only a minute or two into this process that I realised I hadn't released the mold, which meant I'd probably be having a nightmare trying to get the resin cast out of this. It's OK, it's not like the release agent was nearby or anything, like a whopping mile or something... oh wait...
Well, that's what excitement and enthusiasm gets you, hasty mistakes! Either way I wasn't too bothered I was going fast anyway, just checking viability.
I was right, getting the resin cast out of there was a nightmare, and a feat of strength, but after a bit of warping it came out and i was able to roughly put it back into the right shape. Several things were apparent:
Good test, next time, I'll probably use wood, sanded down to good angles, followed by perhaps a filler layer smoothed down very fine, and topped with resin to give it a polished surface before casting. I'll use a spray release to prevent any unusual transfer, and slush cast as I did before.
I had some clear resin from Alumilite lying around, and in a moment of craziness decided to see if I could rapid prototype a Dreamstone from a basic mold and cast process of the simplest variety.
Starting with the foam board I glued together from the last post, I manually cut down the edges with an Xacto blade to the best of my steady-hand ability (beer may have been required to steady that hand), and then used some clay to fill and roughly smooth down the edges.
Once done, I then whipped up a quick box, applied some Vaseline to the surface of the prototype gem shape as a release agent (it was lying nearby from a previous life cast I had done), and poured myself a concrete mold.
Not bad, not bad at all, but I could already see some potentially hazardous and troublesome undercuts, nonetheless I pressed on. I mixed up my clear resin, put a thin red wash of 'paint' in there, and 'Slush cast' the resin around the inside.
It was only a minute or two into this process that I realised I hadn't released the mold, which meant I'd probably be having a nightmare trying to get the resin cast out of this. It's OK, it's not like the release agent was nearby or anything, like a whopping mile or something... oh wait...
Well, that's what excitement and enthusiasm gets you, hasty mistakes! Either way I wasn't too bothered I was going fast anyway, just checking viability.
I was right, getting the resin cast out of there was a nightmare, and a feat of strength, but after a bit of warping it came out and i was able to roughly put it back into the right shape. Several things were apparent:
- A vacuum former would be awesome.
- The Vaseline layer that released the foam from the concrete was clearly too thick/course, and this transferred all the way to the final cast, the pattern was evident on the resin.
- In that regard, if casting in resin, I'd have to do a lot of work buffing the positive I was going to cast into almost perfect shape, or find some way of polishing the final cast down smooth.
- The colour transferred well, will have to go bolder, and look into resin dyes.
Good test, next time, I'll probably use wood, sanded down to good angles, followed by perhaps a filler layer smoothed down very fine, and topped with resin to give it a polished surface before casting. I'll use a spray release to prevent any unusual transfer, and slush cast as I did before.
Labels:
Alumite,
Cast,
Clay,
Concrete,
Dream,
Dreamstone,
Foam Board,
Foamcore,
Gaiman,
Mold,
Mother Mold,
Release,
Resin,
Ruby,
Sandman,
Shell
Subscribe to:
Posts (Atom)