Monday, April 30, 2012

The Sandman's Ruby (Dreamstone Pt.2)

OK, so I've never tried to reproduce 'sturdy glass' before, and even fake gemstones are something I've considered to be too heavy in large sizes for anyone to wear all night, unless you are Mr. T of course.

I had some clear resin from Alumilite lying around, and in a moment of craziness decided to see if I could rapid prototype a Dreamstone from a basic mold and cast process of the simplest variety.

Starting with the foam board I glued together from the last post, I manually cut down the edges with an Xacto blade to the best of my steady-hand ability (beer may have been required to steady that hand), and then used some clay to fill and roughly smooth down the edges.


Once done, I then whipped up a quick box, applied some Vaseline to the surface of the prototype gem shape as a release agent (it was lying nearby from a previous life cast I had done), and poured myself a concrete mold.


Not bad, not bad at all, but I could already see some potentially hazardous and troublesome undercuts, nonetheless I pressed on. I mixed up my clear resin, put a thin red wash of 'paint' in there, and 'Slush cast' the resin around the inside.

It was only a minute or two into this process that I realised I hadn't released the mold, which meant I'd probably be having a nightmare trying to get the resin cast out of this. It's OK, it's not like the release agent was nearby or anything, like a whopping mile or something... oh wait...


Well, that's what excitement and enthusiasm gets you, hasty mistakes! Either way I wasn't too bothered I was going fast anyway, just checking viability.

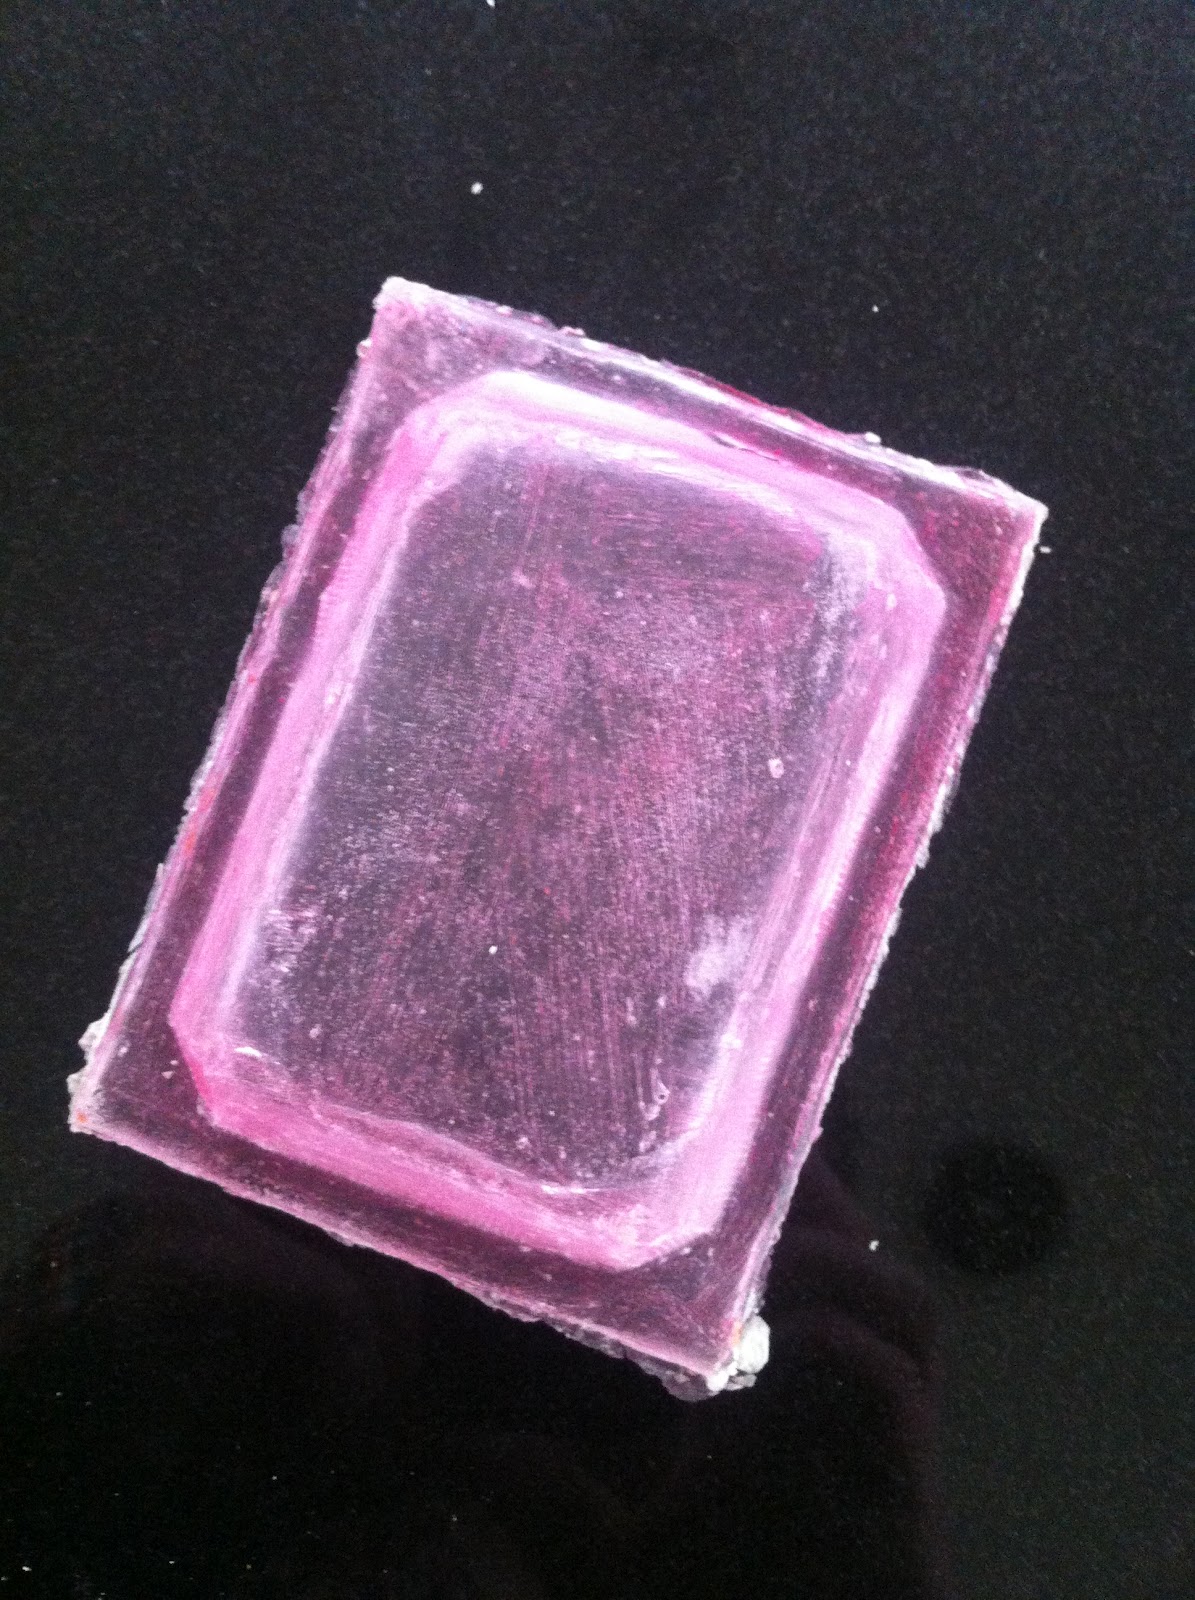
I was right, getting the resin cast out of there was a nightmare, and a feat of strength, but after a bit of warping it came out and i was able to roughly put it back into the right shape. Several things were apparent:
  1. A vacuum former would be awesome.
  2. The Vaseline layer that released the foam from the concrete was clearly too thick/course, and this transferred all the way to the final cast, the pattern was evident on the resin.
  3. In that regard, if casting in resin, I'd have to do a lot of work buffing the positive I was going to cast into almost perfect shape, or find some way of polishing the final cast down smooth.
  4. The colour transferred well, will have to go bolder, and look into resin dyes.


Good test, next time, I'll probably use wood, sanded down to good angles, followed by perhaps a filler layer smoothed down very fine, and topped with resin to give it a polished surface before casting. I'll use a spray release to prevent any unusual transfer, and slush cast as I did before.

Sunday, April 22, 2012

The Sandman's Pouch

My wonderful friend and leatherworker, Margaux, only about a week after me requesting it, made me an amazing pouch, which is the third item on the costume list. It seems relatively simplistic in the comic, with a drawstring tie, sometimes it is depicted as being wrapped around his wrist:


It's awesomely true to the original idea, draw string like the more complex one in the comic, and also has a little Margaux flare with the red lining so that it can actually hold sand.

Check it out!


Saturday, April 21, 2012

The Man Cave

I had some folks asking how my 'man-cave', or workshop to everyone else, or garage to me, was doing, so I'm pleased to say its in a state where I don't work at all in my living room any more, which bodes very well for my overall health and lack of chemical spills in there! :p

Here's a pic, all gussied up.

Wednesday, April 18, 2012

The Sandman's Helm

Continuing with the Sandman project, the main sigil/totem of Morpheus is the Dream Helm, which is described as follows:

"The Helmet of Dream is a mask of pure dream stuff and is one of his three symbols of office; the other two being his sand pouch and the Dreamstone. Dream crafted the helmet himself ages ago, sculpted from the bones of a dead god."

Thankfully, there is a tonne of concept art in the Absolute Sandman Volume 1, and the one I shall be following most is this:


Though I also really like the profiles on these ones too, they have an almost Cthulian quality (well, it is an Old God), which I hope to capture:


I had to start by thinking a lot on how, when and where it will finally be worn. Firstly, I wanted it to be tight fitting to my head, yeah, I've got an L-sized noggin, and this bad-boy is probably going to make it look ridiculous, so keeping it trim to the head will be a priority. With that in mind, I also might want some cooling in it. It's quite a tall helm, so that could be fitted in the rear back. Another issue might be the weight and comfort, as well as being able to drink if possible!

I had the idea of starting with an old army surplus gas mask, as they usually come with attached drinking spouts, and the position of the gas filter on the front is almost exactly aligned with the 'spine' coming out of the front of the dream helm. So, I bought a gas mask and started cutting it up in the general shape of the face section of the helm.


I'm going to sculpt the rest of the helm around this in the hope that at the end of the project, I'll be able to slide it on and strap it in, allowing full, non-shaky movement, AND utilize the drinking pipe so that I don't have to take it off. Which led to the next key issue, the 'spine' at the front. In a lot of pictures, it looks like a set of simply ribbed pipes, but I've never really liked that as a concept if this was 'fashioned from the skull of an old god', so I decided to go literal, and buy a medical spine, which I plan to cut into the right pieces (removing the top and hip parts, leaving just a spine section) and attaching it securely to the front of the mask and blending it in.


It doesn't weigh all that much right now, but then again, it isn't currently attached to my face. Another good reason to strap in the helm to my head, but I'm still concerned it might be heavy, so we shall see about maybe hollowing parts out later if need be, perhaps fit the drinking pipe in there later?

More on it soon!

Sunday, April 15, 2012

The Sandman's Ruby (Dreamstone)


"I walk across the dreaming sands under the pale moon: through the dreams of countries and cities, past dreams of places long gone and times beyond recall."


So I seem to have taken on what appears to be a quite ambitious project, and that is to re-create the visage of Dream of the Endless, otherwise known as Morpheus from Neil Gaiman's graphic novel 'The Sandman'. To ease myself into the project (and prop making in general), I decided to start with one of the three 'lost totems' he goes to find after his capture.

The three items are his helm, a pouch of dream sand, and a ruby (dreamstone) attached to a chain.

As I know a talented leatherworker, I decided to offload that little project to her, and I look forward to how it's going to turn out. I therefore started late in the evening on the ruby, which will definately be easier than the helm. Here's the art I shall be trying to follow:


I started pretty late in the evening, so to begin the prototype, I roughed out the size I wanted on a slice of foam board, then glued three layers together with PVA glue. I marked the final shape I wanted to achieve, and we are off and running!


Throughout this whole blog, comments, tips, praise and criticism (so long as it's constructive!) are always welcome! More soon!

Saturday, April 7, 2012

Rebound 25 Poi Candles

A trip into new materials and the start to prop making with the amazing, as always, collaboration of Margaux Bunel! Sadly missed the deadline by a LONG way, but we got there in the end after much iteration.

Thanks Mx, and Happy Birthday Jillian!


The finished iterations!

Upper left - The first mold, shattered down one side, and needed a lot of repairing for recast.

Upper Middle - The final cast! Molded using silicone rubber. Churning out the birthday candles!

Upper right - A much cleaner cast, lost a bit of detail for some reason.


Applying the first layer of Rebound 25 silicone from SmoothOn.com.


And now... we wait (for about an hour).


Yeah, it got reeaaal messy from time to time. ;)


The mayhem machine.


I had to employ some engineering, yep, I was winging a lot of this using random kitchen supplies!

I barely even know what's going on half the time.


Let's get the party started, coloured and scented wax - GO!


And now...


... we wait.


The first two pulls, some air-bubbling and some decoloration but that fits the style. All in all, niccccce!


All three together, 1 Gardenia scented, 2 mint.