The tools of the trade! The skull, Gel 10 and pigments read to roll, and chip brushes that i'll never be able to use again!
First Gel 10 layer, details, though there aren't too many details on this skull. Within about 10 seconds I learned I should have paid more attention to the undercuts AND glued the skull down. ;)
Layer 2, blue pigment, just building up the thickness now, bye bye swizzle sticks (and probably cups)!
Close up of layer two as it 'kicks' (rubberizes).
Layer three, added some thickener so that I could start dragging the gel into the deep recesses, so we don't have a problem with the plaster shell later.
6 cups down, and waiting till its almost solidifed! Gotta be careful not to touch the surfaces or else they'll delaminate.
Final layer, attempting to finish off those deep recesses, so we dont have undercuts for the mother mold to latch onto.
Close up, I had a hard time with this layer, I accidentally added a bit too much thickener, and it started to kick before I was fully smoothed out, but that's what experiments are for, to get used to the materials!
I probably should have done this in my garage, but I wanted to watch a movie and sit down comfortably, I was under the weather, after all!
First half of the mother mold, at this point I was skeptical about whether or not I was going to be able to release it... we'll see.
The mayhem in progress.
Second half done...
... and now we wait!
BAM! It worked, mother mold came off just fine. :)
And there she is, all ready for casting!
Plaster test first, I think, because of the inexpensive nature of the material. I think ill move to foam if this works out because in hindsight a skull of this density is f'ing heavy!
It's like someone killed a Weyland Yutani android in here, and gave up half way through cleaning...
Ta-Da! Skull copied, a couple of fine air bubbles, but nothing some Bondo and some sandpaper won't fix.
Dramatic side view!
Meanwhile, at the side of the table... some cheap-ass 'Lazy Susans' in progress. And by that, I mean stands that probably won't work.
Now for the transformation, took a saw to the nub at the top, and sanded it down a bit, cut the large rectangular block off the bottom so it sits more naturally, then started carving out the details, starting with the teeth. :)
Progress so far, teeth done, jaw defined, nose and eye sockets need more work, but I'd call this a success, ready for re-cast and re-production!
Sunday, February 5, 2012
Saturday, January 28, 2012
Oven Build!
I found designs for an oven
build online in Stop Motion Magazine, and decided that instead of
destroying my oven at home and rendering it useless for all future food
exploits, and instead of buying an oven second hand or otherwise, I'd
just make one!
All in all came in at about $250 and change for all the raw materials! The experience alone was more than worth it, but I now have a 3'x2'x4' specialised oven as well. . ;)
This was the goal... well, not really.
Raw materials (not all show in this particular pic) - bought! ~$250 in total.
Manly tools that can lop an arm and a foot off, but nonetheless the wood felt its wrath!
I shall free the base and the roof from their conjoined bonds!
I realllly need to buy a workbench, but these sturdy chairs did for now!
It's like a heat resistant skateboard!
The frame taking shape...
This is the shape of things to come. *badum-tish*
Support frame for the rack that'll come right at the end of the build.
Applying the foil sided outer walls. Heat retention is a must on all the surfaces, so I thought!
The front wall needed the door cut out, that looks about right to fit a human bod... I mean cast through!
Manly times require manly actions! Grinding at its finest! Let the sparks fly!
Ok, ok, so I enlisted some girly help, but she had to shave every 30 minutes due to the pure manliness in this build! I swear!
Margaux REALLY liked grinding. Who am I to complain?
Foil sided insulation filling out the frame.
The front needed a bit more care and attention around the edges. Great work, Mx!
She definately seemed to be enjoying the whole process...
...uhm, ok, maybe there's something else going on here I can't explain.
Finished frame and insulation...
... with a view of the inside.
First stage clean-up!
Yes, I did do some work on this project, I didn't just leave it all to Mx... I used the power of mathematics! Look at that sexy geometry!
Ok, well maybe that's all I did.... look at those guns, and those inadvertantly elven ears!
Skip ahead, duct holes cut, door attached with sliding locks and everything! Fan Attached to the roof and tested.
Check this beast out, coming along nicely.
Margaux REAAALLLLY liked grinding.
Duct (and eye's and teeth) attached! Domo arigato, Mr. Roboto.
Glamourous side shot!
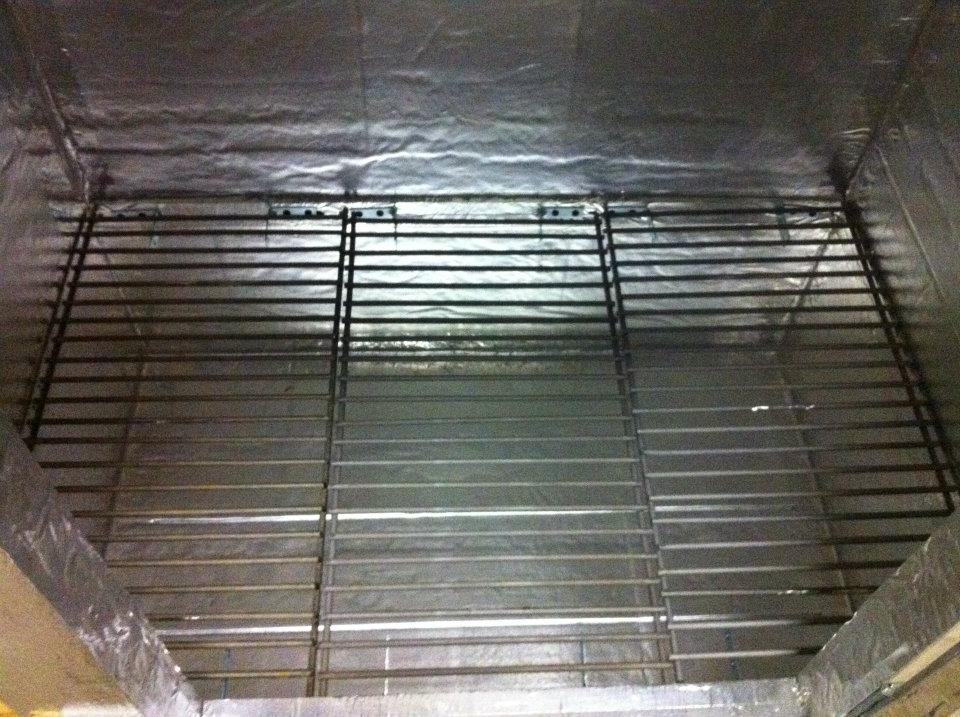
Rack fitted, might need to add a few more supports in there later.
Might also need to even out the rungs a bit.
Finished! External thermometer (nose) added for gauging temp inside, and wiring routed to extension socket that has it's own on/off switch.
She's one fine lookin' oven, open wiiiide...
Thar she blows, let's kick this into action and start cremating babi... I mean making stuff!
Oh, what does that say there?
Over 200 degrees Farenheit, bingo! You could boil water in thar!
I didn't even have to set myself on fire to do it.
All in all came in at about $250 and change for all the raw materials! The experience alone was more than worth it, but I now have a 3'x2'x4' specialised oven as well. . ;)
This was the goal... well, not really.
Raw materials (not all show in this particular pic) - bought! ~$250 in total.
Manly tools that can lop an arm and a foot off, but nonetheless the wood felt its wrath!
I shall free the base and the roof from their conjoined bonds!
I realllly need to buy a workbench, but these sturdy chairs did for now!
It's like a heat resistant skateboard!
The frame taking shape...
This is the shape of things to come. *badum-tish*
Support frame for the rack that'll come right at the end of the build.
Applying the foil sided outer walls. Heat retention is a must on all the surfaces, so I thought!
The front wall needed the door cut out, that looks about right to fit a human bod... I mean cast through!
Manly times require manly actions! Grinding at its finest! Let the sparks fly!
Ok, ok, so I enlisted some girly help, but she had to shave every 30 minutes due to the pure manliness in this build! I swear!
Margaux REALLY liked grinding. Who am I to complain?
Foil sided insulation filling out the frame.
The front needed a bit more care and attention around the edges. Great work, Mx!
She definately seemed to be enjoying the whole process...
...uhm, ok, maybe there's something else going on here I can't explain.
Finished frame and insulation...
... with a view of the inside.
First stage clean-up!
Yes, I did do some work on this project, I didn't just leave it all to Mx... I used the power of mathematics! Look at that sexy geometry!
Ok, well maybe that's all I did.... look at those guns, and those inadvertantly elven ears!
Skip ahead, duct holes cut, door attached with sliding locks and everything! Fan Attached to the roof and tested.
Check this beast out, coming along nicely.
Margaux REAAALLLLY liked grinding.
Duct (and eye's and teeth) attached! Domo arigato, Mr. Roboto.
Glamourous side shot!
Rack fitted, might need to add a few more supports in there later.
Might also need to even out the rungs a bit.
Finished! External thermometer (nose) added for gauging temp inside, and wiring routed to extension socket that has it's own on/off switch.
She's one fine lookin' oven, open wiiiide...
Thar she blows, let's kick this into action and start cremating babi... I mean making stuff!
Oh, what does that say there?
Over 200 degrees Farenheit, bingo! You could boil water in thar!
I didn't even have to set myself on fire to do it.
Subscribe to:
Posts (Atom)